When you walk into a bathroom, the toilet might seem like one of the simplest fixtures in the house. In reality, it is a carefully engineered system where each component plays a vital role. Among all these parts, one of the most overlooked yet essential is the toilet trip lever. Without it, flushing would not be possible.
The toilet trip lever is more than just a small handle on the side or top of the toilet tank. It is the trigger that sets the entire flushing mechanism into motion. Pressing the handle may feel effortless, but behind the scenes, a chain reaction takes place: the lever moves, the chain lifts, the flapper opens, and water rushes from the tank into the bowl to remove waste. This seamless operation makes the trip lever one of the most important parts of the toilet’s design.
In modern bathrooms, the toilet trip lever is not just a functional element—it also reflects style and efficiency. Today’s levers come in a variety of materials, finishes, and even advanced versions such as touchless or dual-flush systems. Beyond appearance, they play a direct role in water conservation, since the flushing process relies on their performance.
This article will explore everything you need to know about the toilet trip lever. We’ll cover what it is, how it works, why it matters, and how to replace or upgrade it when needed. By understanding this simple yet vital component, you’ll gain insight into how your toilet functions and how small improvements can lead to a more efficient bathroom experience.
What is a Toilet Trip Lever?
At first glance, the toilet trip lever may look like nothing more than a simple handle on the outside of the tank. However, this small device is the starting point of the entire flushing cycle. Without it, the toilet would remain silent and still, unable to dispose of waste properly.
The Basic Definition
A toilet trip lever is a mechanical trigger that initiates the flush. When pressed, it sets a sequence of movements into motion: the handle pivots, the lever arm inside the tank lifts a chain, and that chain raises the flapper. Once the flapper opens, water flows from the tank into the bowl with enough force to clean and reset the system.
In short, the toilet trip lever is not just a handle—it is the command center of your toilet’s flushing system.
Core Components of a Traditional Toilet Trip Lever
To understand its function better, let’s break down its key elements:
- Handle – The part visible on the outside of the tank, usually made of metal or durable plastic.
- Lever Arm – A rod inside the tank, attached to the handle, responsible for transferring motion.
- Chain or Lift Wire – Connects the lever arm to the flapper.
- Flapper Valve – The component that seals the flush valve opening at the bottom of the tank. When lifted, it allows water to escape into the bowl.
Together, these components transform a simple push into a full flush.
Updated Toilet Trip Lever Designs
Toilets have advanced significantly in the last few decades, and so has the trip lever:
- Side-Mounted Levers – Common in most traditional toilets, located on the left or right side of the tank.
- Front-Mounted Levers – Positioned at the front for easy accessibility, often found in compact bathrooms.
- Top-Mounted Buttons – Increasingly popular in modern toilets, especially with dual-flush designs.
- Touchless Levers – Equipped with sensors that allow users to flush without touching the toilet, promoting hygiene.
Beyond Functionality: Aesthetic Role
Interestingly, the toilet trip lever is also becoming a style statement. Homeowners can now choose from brushed nickel, matte black, chrome, or even antique brass finishes to match bathroom fixtures. In luxury bathrooms, the lever is not just a tool but a piece of design that ties the space together.
Why It Matters
Even though it seems small, a malfunctioning toilet trip lever can make your toilet almost unusable. Without it, the flapper cannot lift, and flushing won’t occur. That’s why manufacturers sell trip levers and handles as a set, making replacements simple and affordable.
How Does a Toilet Trip Lever Work?
The toilet trip lever is the spark that sets the entire flushing sequence into motion. While it might look like a simple push of a handle, the mechanism behind it is a chain of coordinated actions that involve physics, water pressure, and precision design. Understanding how this system works not only helps you appreciate its engineering but also makes troubleshooting much easier when problems occur.
Step 1: Pressing the Toilet Handle
The flushing cycle begins the moment you press the toilet handle. That slight push applies force to the external handle, which is connected to the trip lever inside the tank. Depending on the toilet model, this may be a side handle, a front-mounted handle, or even a top-mounted button. Regardless of design, the action is the same: applying pressure initiates movement.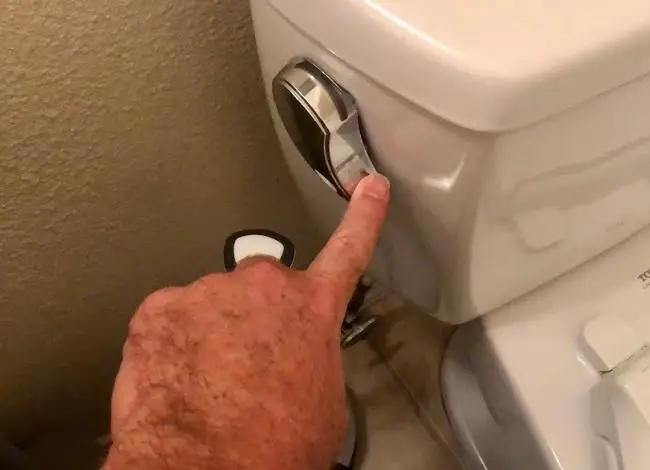
Step 2: Activating the Lever Arm
Inside the tank, the handle is attached to a lever arm—often made of brass, stainless steel, or durable plastic. When you push down, the arm pivots upward on the opposite end. This simple motion is critical because it translates your hand’s push into mechanical energy that lifts the chain connected to the flapper.
Step 3: Lifting the Chain
The chain (or sometimes a lift wire) connects the trip lever arm to the flapper valve at the base of the tank. As the lever pivots, the chain rises. If adjusted properly, this movement is enough to raise the flapper just high enough for water to rush through. Too much slack in the chain, however, can result in a weak flush; too little slack may prevent the flapper from closing.
Step 4: Opening the Flapper Valve
The flapper is a rubber or silicone seal that covers the flush valve at the bottom of the tank. When lifted by the chain, it swings open like a trap door. This allows gravity and water pressure to send a surge of water from the tank into the toilet bowl. The power of the flush depends largely on this moment.
Step 5: Completing the Flush Cycle
Once the water leaves the tank, the flapper falls back into place, sealing the flush valve. At this point, the fill valve activates, refilling the tank for the next use. The trip lever and handle reset automatically, ready to repeat the cycle.
Modern Variations in Flushing Mechanisms
While the basic process remains the same, modern toilets have introduced new variations in how the toilet trip lever works:
- Dual-Flush Buttons – Instead of a lever, some toilets use two buttons for different flush volumes (half flush for liquid waste, full flush for solid waste).
- Touchless Levers – Use motion sensors to lift the chain electronically without physical contact.
- Pressure-Assisted Systems – In high-efficiency toilets, the trip lever may activate a pressurized chamber, boosting flush strength while using less water.
Why Understanding This Mechanism Matters
Knowing how a toilet trip lever works has several benefits:
- It helps diagnose problems like weak flushes, continuous running water, or stuck handles.
- It allows homeowners to make simple adjustments, like tightening a chain or replacing a worn flapper, without calling a plumber.
- It highlights how a small component contributes to water efficiency and bathroom performance.
In essence, the toilet trip lever is not just a handle—it is the starting point of a carefully synchronized process that ensures every flush is smooth, clean, and efficient.
Why the Toilet Trip Lever Matters
It’s easy to overlook the toilet trip lever because of its small size and simple appearance. Yet, without it, the entire flushing process would fail. A toilet without a functioning trip lever is essentially unusable. This tiny part plays a big role in ensuring efficiency, convenience, and even style in your bathroom.
1. The Heart of the Flushing Mechanism
The toilet trip lever is the first step in the flushing chain reaction. Without it, the chain cannot lift, the flapper cannot open, and water cannot flow into the bowl. In other words, a broken or faulty lever makes flushing impossible. While many homeowners think of the flapper or fill valve as the “important” parts, none of these can do their job without the trip lever triggering them.
2. Water Efficiency and Conservation
Modern toilets are designed with efficiency in mind, and the trip lever plays a role in that. For example:
- A properly adjusted lever ensures the flapper opens wide enough for a complete flush, preventing the need to flush multiple times.
- In dual-flush toilets, the buttons or levers give users the choice between a partial flush (using around 1 gallon of water) or a full flush (using 1.6 gallons or more). This simple mechanism can save thousands of gallons per household each year.
- Faulty or sticky levers may keep the flapper partially open, causing continuous water flow—a common reason for high water bills.
By maintaining the toilet trip lever, you are not only keeping your toilet functional but also contributing to water conservation.
3. User Experience and Comfort
The act of flushing should be quick, smooth, and effortless. A stiff, squeaky, or loose trip lever interrupts this ease. Think of how frustrating it is to push a handle multiple times just to get a proper flush. A well-functioning toilet trip lever ensures a smooth user experience and peace of mind after every use.
4. Aesthetic and Design Value
In the past, a toilet trip lever was simply a practical component, often made of basic chrome or plastic. Today, it can also be a design element. Homeowners renovating their bathrooms often choose stylish levers in finishes such as:
- Brushed nickel
- Matte black
- Antique brass
- Polished chrome
These levers not only match faucets and showerheads but also elevate the overall look of the bathroom. For luxury or designer toilets, the trip lever is as much a style statement as it is a functional necessity.
5. Longevity of the Toilet System
Because the trip lever interacts with the chain and flapper, its performance directly impacts the lifespan of other toilet components. For instance:
- A misaligned lever can put strain on the chain, causing it to snap.
- A poorly adjusted lever may prevent the flapper from sealing properly, wearing it out faster.
- Continuous strain caused by a sticky lever can lead to early handle breakage.
In short, the condition of your toilet trip lever can either extend or reduce the overall life of your toilet’s flushing system.
Updated Context: Eco-Friendly Innovations
As environmental awareness grows, the trip lever is evolving into smarter designs. Touchless levers not only prevent germ transfer but also provide controlled water use. In commercial restrooms, sensor-based levers have become standard, ensuring hygiene and efficiency. Even in residential bathrooms, these upgrades are becoming increasingly affordable, blending convenience with sustainability.
Why You Should Care About This Small Part
Most people don’t think about their toilet trip lever until it breaks. But the truth is, this little handle is a vital component of your home’s plumbing efficiency. Caring for it means saving water, avoiding repair costs, and ensuring that one of the most used fixtures in your home works reliably every single day.
How to Replace a Broken Toilet Trip Lever
A broken toilet trip lever can turn one of the simplest household tasks—flushing—into a frustrating experience. Fortunately, replacing it is one of the easiest DIY plumbing jobs you can do at home. With a few basic tools and about 15 minutes of your time, you can restore your toilet to perfect working condition.
Step 1: Turn Off the Water Supply
Before working on any toilet repair, always turn off the water supply. Locate the shutoff valve (usually behind or near the base of the toilet) and turn it clockwise until the water stops. Then flush the toilet once to empty most of the water from the tank. Use a sponge or towel to soak up any leftover water at the bottom.
Step 2: Remove the Tank Lid
Carefully lift the tank lid and set it aside on a towel or soft surface. These lids are heavy and can crack easily if dropped, so handle them with care. Once the lid is off, you’ll see the internal flushing components, including the trip lever arm, chain, and flapper.
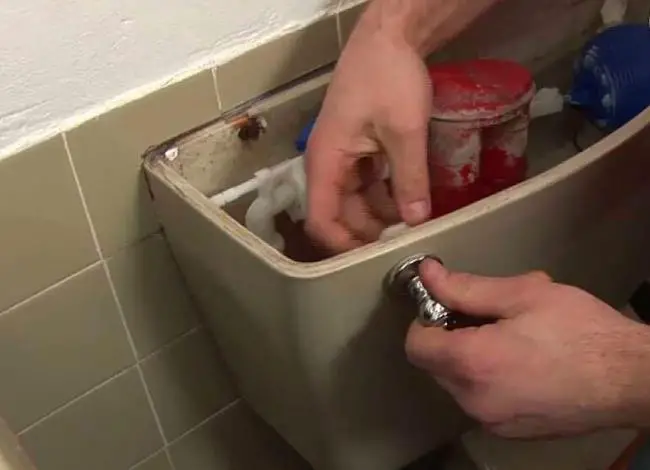
Step 3: Disconnect the Old Trip Lever
Inside the tank, the lever arm will be connected to the flapper chain. Unhook the chain first. Next, look for the mounting nut that holds the handle in place. In most toilets, this nut is reverse-threaded, meaning you need to turn it clockwise to loosen. Use a wrench or pliers if necessary, but be gentle to avoid cracking the porcelain. Once the nut is removed, slide the old trip lever and handle out of the tank.
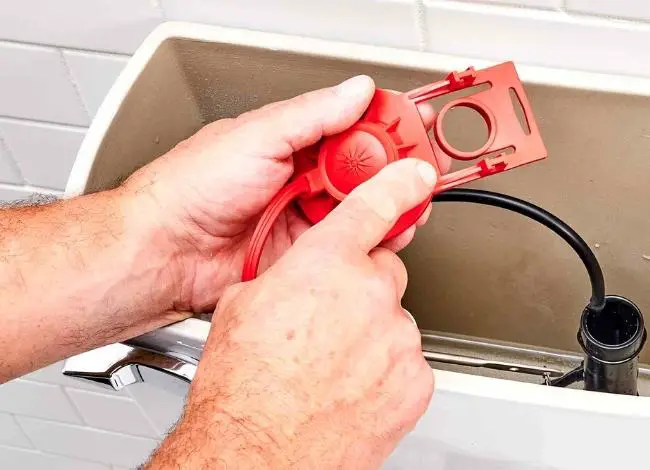
Step 4: Prepare the New Trip Lever
Most replacement trip levers come with a handle, lever arm, mounting nut, and sometimes a rubber washer. Make sure the new lever matches your toilet’s design—side-mounted, front-mounted, or top-mounted. Slide the new lever into the hole in the tank, ensuring the handle sits flush against the outside.
Step 5: Install and Secure the Lever
Tighten the mounting nut from the inside of the tank. Remember: if it’s a reverse-threaded nut, turn it counter-clockwise to tighten. Do not overtighten, as this could crack the tank. The handle should feel secure but move freely when pressed.
Step 6: Reattach the Chain
Reconnect the chain to the lever arm. The chain should have a small amount of slack—too loose and the flapper won’t lift, too tight and the flapper won’t close properly. Adjust the hook placement until the flapper opens fully when you press the handle.
Step 7: Test the Flush
Turn the water supply back on and allow the tank to fill. Then press the handle to test the flush. If the flapper opens fully and closes properly, and the water flow stops after the tank refills, the installation was successful. Finally, replace the tank lid.
Common Mistakes to Avoid
- Overtightening the nut – This can crack your toilet tank, leading to costly repairs.
- Incorrect chain length – Too much slack leads to weak flushes; too little prevents sealing and causes constant running water.
- Choosing the wrong lever type – Side, front, and top levers are not interchangeable. Always check your toilet’s design before buying a replacement.
Cost and Time Estimate
Replacing a toilet trip lever usually costs less than $20 for parts and takes less than 20 minutes. Compared to calling a plumber, which could cost $75–$150 for such a simple job, DIY replacement saves both money and time.
Updated Options: Upgrading Instead of Replacing
While you’re at it, consider upgrading to a modern trip lever:
- Dual-flush buttons – Save water with customizable flush volumes.
- Touchless trip levers – More hygienic, especially in households with children or shared bathrooms.
- Designer finishes – Coordinate your lever with faucets and hardware for a cohesive bathroom style.
Replacing a broken lever is not just about restoring function—it’s also an opportunity to improve efficiency and aesthetics.
Troubleshooting and Maintenance Tips
Even after replacing or upgrading your toilet trip lever, you may encounter minor issues from time to time. Because this small part interacts directly with the chain, flapper, and water flow, any misalignment or wear can cause performance problems. The good news is that most issues are easy to diagnose and fix without calling a plumber.
Common Toilet Trip Lever Problems and Fixes
1. Loose or Wobbly Handle
If the handle feels slack or jiggles excessively, the mounting nut inside the tank may be loose. Simply tighten the nut (remembering that most are reverse-threaded) until the handle is snug but still moves smoothly.
2. Weak or Partial Flushes
A weak flush is often the result of too much slack in the chain. When the trip lever lifts, the flapper doesn’t open wide enough, releasing only part of the water. Adjust the chain so it has just enough tension to fully raise the flapper without pulling it too tightly.
3. Continuous Running Water
If your toilet runs constantly, the flapper may not be sealing properly. Sometimes, this happens because the chain is too tight and prevents the flapper from closing completely. Adjusting the chain length usually solves the problem. If not, the flapper itself may need replacement.
4. Sticking or Stiff Handle
A handle that resists movement may be due to mineral buildup, rust, or worn plastic parts. Clean the lever arm and pivot points, and if that doesn’t solve the issue, replace the lever. In humid environments, plastic levers may warp over time, making a metal replacement a better option.
5. Lever Doesn’t Return to Position
If the handle remains pressed down after flushing, it usually indicates friction or poor alignment of the lever arm inside the tank. Make sure nothing is blocking the lever’s movement and that it pivots freely.
Maintenance Tips for a Long-Lasting Toilet Trip Lever
- Inspect regularly – Check the handle, lever arm, and chain every few months to ensure everything is secure and properly aligned.
- Keep it clean – Wipe away mineral deposits and dirt inside the tank that may cause parts to stick.
- Replace parts when needed – Don’t wait for the handle to snap. If you notice cracks or stiffness, replace the lever early to prevent further problems.
- Upgrade for efficiency – Consider switching to dual-flush or touchless levers for improved water conservation and hygiene.
Updated Insights: Smart and Eco-Friendly Options
Technology is changing even the simplest bathroom parts. Today’s toilet trip lever can do more than just trigger a flush:
- Touchless trip levers use motion sensors, reducing the spread of germs in family bathrooms and public restrooms.
- Dual-flush systems allow precise water use, cutting household water bills by up to 67% compared to older single-flush models.
- Designer levers combine function with bathroom aesthetics, offering finishes that complement faucets and shower fixtures.
By upgrading your toilet trip lever, you can enhance comfort, protect the environment, and improve the appearance of your bathroom—all with one small change.
Final Thoughts
The toilet trip lever might seem insignificant, but it is the key to one of the most essential daily routines in any home. From initiating the flush to ensuring water efficiency, this part plays a central role in your toilet’s operation. By maintaining, troubleshooting, and upgrading your lever, you not only keep your toilet functional but also improve its performance and longevity.
Whether you’re fixing a loose handle, adjusting a chain, or upgrading to a touchless system, the toilet trip lever deserves more attention than it usually gets. It’s a small component that delivers a big impact—proof that sometimes, the simplest parts of our homes are also the most important.
Hi, this is Robert Crossan, the owner of this website, has 17 years of experience in the installation, maintenance, and repair of toilets and plumbing systems. After completing the Level 2 Basic Plumbing course in 2005, I started working in both domestic and commercial buildings as a professional plumber. So I can figure out the core difference between different toilet models and brands. It also helped me monitor their work performance and setbacks.