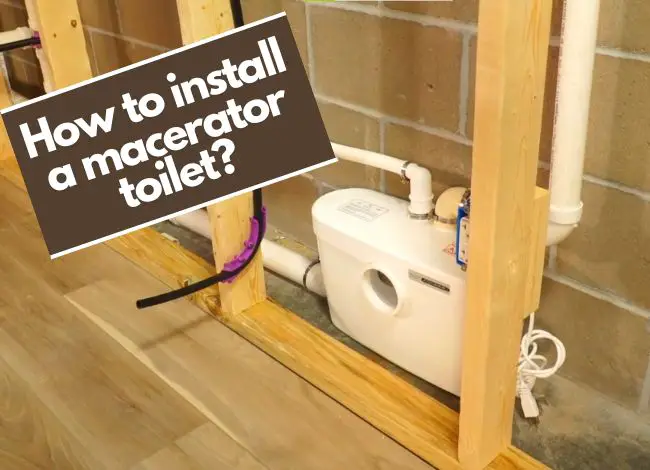
A macerator toilet is a smart solution for modern bathrooms—using less water while efficiently handling waste. It allows for flexible installation, even in spaces where traditional plumbing might not be possible. Below is a step-by-step guide on how to install a macerator toilet. Follow this guide to ensure a hassle-free setup.
Step 1: Install the Main Discharge Pipe
To begin, you’ll need to connect the macerator toilet to the home’s soil stack. In this step, replace or modify the existing soil pipe by adding a Y-connector or T-connector, depending on your setup. The connector must be installed at an appropriate angle to ensure smooth flow of waste into the main drainage line. This connector links directly to the concealed macerator pump.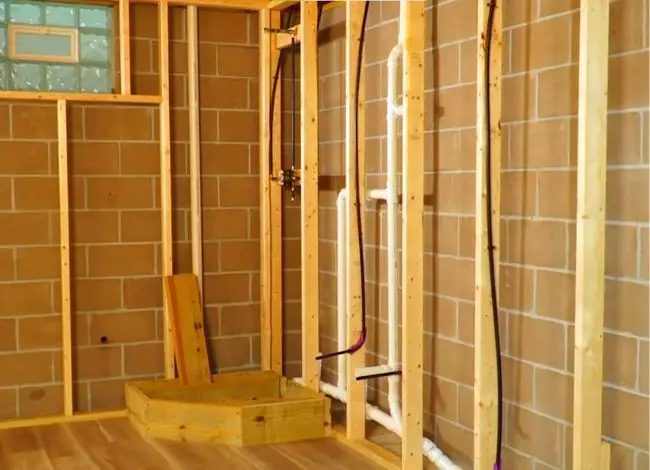
Make sure you leave at least 12 inches of space behind the wall framing to accommodate the macerator unit. Once this is done, connect the water supply line to the toilet. If you are installing a Saniflo macerator system, it may require a direct connection to your home’s existing water supply or a new line with an appropriate adapter.
If your installation includes a sink or additional bathroom fixtures, ensure you use compatible connectors and adapters to merge with the macerator system. Secure the tap or faucet by following the manufacturer’s installation instructions.
Step 2: Connect to the Power Supply
Macerator toilets like Saniflo require a power source to operate. Connect the unit to a dedicated 15-amp electrical circuit for optimal performance. It is highly recommended to use a Ground Fault Circuit Interrupter (GFCI) outlet for safety, as the system is used in a wet environment.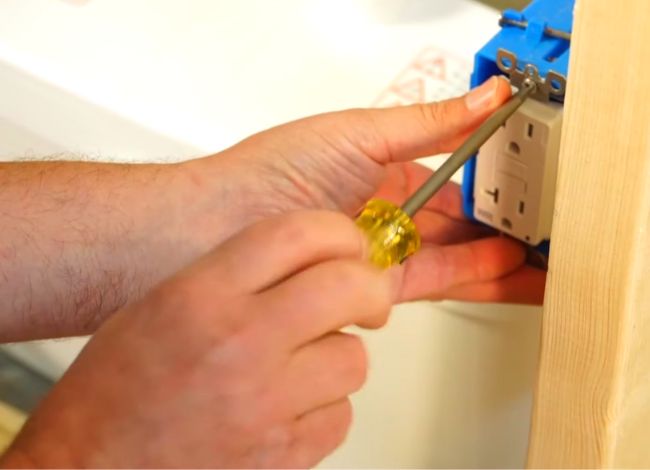
Ensure the power cable is securely connected and does not interfere with other plumbing or electrical systems. Before turning the system on, unplug any nearby sump pumps to avoid electrical overload or interference with the main discharge system.
Step 3: Add the Venting Pipe Properly
This step is one of the most important, especially when using a system like the Saniflo Sanicompact. Macerator toilets require a venting system to allow air circulation and proper waste discharge through the pump.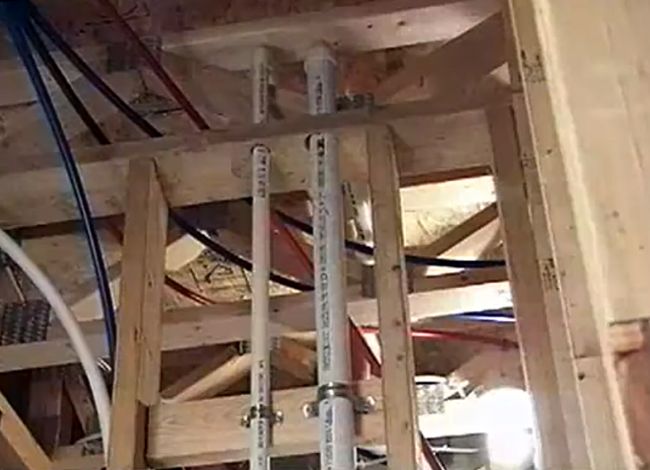
Make sure you understand your local building codes regarding venting. The macerator pump should be connected to a vent that allows air to escape efficiently, ensuring there’s no pressure build-up. Ideally, the vent should be installed in a location where it facilitates smooth airflow and supports the existing home venting system.
If using a Saniflo system, follow their guidelines for vent pipe size and placement. Failing to install the vent correctly can lead to unpleasant odors and poor flushing performance.
Step 4: Assemble All the Components and Finalize the Installation
Now it’s time to assemble all the parts and complete the macerator toilet installation.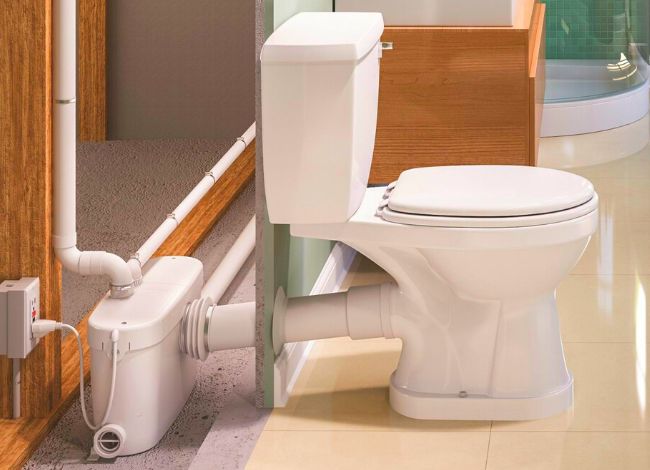
- Begin by installing the discharge elbow, which includes a non-return valve. This valve prevents backflow, ensuring waste moves in the correct direction.
- Ensure the elbow is positioned securely and aligned correctly. A downward slope with a twisting motion is usually required—use a clamp to hold it in place.
- Connect the discharge pipe to the main drain line, keeping it at least 12 inches away to allow for proper pressure and flow.
- The pipe should slope upwards at a consistent incline (approx. 1/4 inch per foot) to ensure smooth drainage.
- Most Saniflo macerators use 3/4-inch or 1-inch piping for the discharge line—check your model specifications.
- Connect the macerator unit to the back of the toilet and secure it to the floor using bolts or nuts.
- Attach the fresh water supply line, ensuring a watertight connection to the fill valve.
- Turn on the water supply and adjust the level to stay half an inch below the overflow tube.
- Plug in the macerator pump and test the system by flushing the toilet. Check for any leaks, unusual noises, or incomplete flushing.
✅ Tip: Always test the system several times to ensure the macerator pump activates and shuts off properly.
Things to Consider Before Installing a Macerator Toilet
Installing a macerator toilet involves more than just connecting a few pipes—it requires proper planning and attention to technical details. Here are key things you must consider before getting started:
1. Use the Right Extension Pipe
When extending the discharge pipe, it’s crucial to use an extension pipe that is compatible with your macerator system. Always match the pipe type and diameter to the original discharge line. If you’re using a Saniflo system, models like Sanibest Pro or Saniaccess are highly recommended due to their superior pumping capabilities and compatibility with multiple fixtures.
Also, keep in mind that the macerator pump should ideally be installed behind the wall for aesthetic and space-saving purposes. However, check the maximum allowable pipe length as exceeding it may reduce system efficiency.
2. Properly Support the Discharge Pipes
Discharge pipes from the macerator toilet must be well-supported to avoid sagging or damage. Use brackets or clamps at regular intervals according to the pipe manufacturer’s guidelines to maintain a consistent slope and reduce stress on pipe joints. Proper support helps prevent backups and blockages, keeping your system running smoothly.
3. Protect Pipes Against Freezing
If the discharge pipes run through areas that are not climate-controlled, such as basements or external walls, you must protect them from freezing. Use insulation sleeves or heat tape approved for plumbing systems to prevent pipe bursts in cold weather. In unheated buildings, winterize the system properly to avoid costly repairs during freezing conditions.
4. Use a Ground Fault Circuit Interrupter (GFCI)
For safety, connect the macerator unit to a GFCI outlet. This helps protect against electrical shocks caused by moisture or power surges. Make sure the system is grounded correctly and test the GFCI regularly to ensure it’s functioning. Always disconnect the power supply before performing any cleaning or maintenance to avoid accidents.
Bonus Tip: Maintain a Proper Pipe Slope
Always install the main discharge pipe with a consistent 45-degree slope, especially for horizontal runs. This ensures a smooth flow of waste and reduces the chances of clogs. Avoid sharp bends and keep the path as straight as possible to promote efficient drainage.
Final Words
A macerator toilet is a game-changer in modern plumbing—it allows you to install a toilet below the main drain line or in locations far from the soil stack. These systems use a powerful pump to grind waste into slurry and move it through small-diameter pipes, even vertically or over long distances.
While the installation process has its complexities, it’s very achievable for DIYers with basic plumbing knowledge. However, if you encounter any confusion or difficulty, don’t hesitate to consult a professional plumber. By following the steps and tips in this guide, installing a macerator toilet can be simple and stress-free.
We are really lucky to have a hard-working, multi-skilled plumber on our team. Collin D. Gallegos, a professional plumber who has worked with us since 2012, is an expert in vent, septic, and drainage systems. He is a Certified Master Plumber and has worked on various commercial plumbing projects. He usually helps our readers resolve plumbing and pipe-related issues with a proper DIY troubleshooting and repair guide.