Is your toilet running continuously? Has the flushing system deteriorated? There may have been some issues with the flushing lever of your toilet. You must be baffled about what to do with the damaged toilet handle. Don’t panic because the replacement process of the toilet flush handle is very straightforward. So let us explore the easiest ways to fix or change the toilet handle.
What is the Toilet Flush Lever?
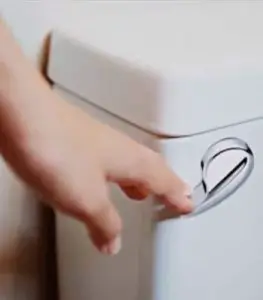
Almost all modern toilets have a toilet lever or toilet handle. Those toilet models that do not have a handle must have a flushing button. The toilet handle is the main visual portion of the commode, and after you press the handle, it opens the flapper that is connected with a chain made of stainless steel. The toilet handle is used to initiate the flush. Sometimes the toilet lever is stuck or cannot initiate the flush due to some sort of rust or corrosion. If you want a long-lasting toilet lever, press it gently after using the toilet.
Different Types of Toilet Flush Lever
You will be surprised to hear the varieties of the flush levers. You may find different types of flush levers in the market. But not all the types are good for the toilet; some of them could be just a fluke, so you must be vigilant before buying the flush handle. Here I am describing some amazing types of flush levers.
-
 Front-Mount Handle
It is the most common classification of toilet handle you may find in the market. The front mount handle is located on the left side of the tank. It can be realized that a front-mount handles flush rod fits inside the tank and rotates parallel to the regulation of the handle lever. The front flushing handle is most comfortable for all because we are used to seeing the front mount handle everywhere.
-
Angle-Mount Handle
It is another excellent type of flush handle that is often found in round toilets as it won’t fit the rectangular toilet. The round toilet needs that extra curvature in the flush handle for extra comfort. The trip lever also has a little amount of curvature so that the chain is decently attached to the flapper. The Angle-Mount Handle is not that common and cannot be compatible with all types of toilets.
-
 Cistern Lever Handle
The extended long-reach cistern lever handles are compatible with toilets that do not have that much visible water tank, or the tank may have been disguised behind the wall or in any sealed structure. Generally, this type of handle has an extended flushing lever so that it becomes easy to flush without any inconvenience.
-
Side-Mount Handle
If you want a more aesthetic toilet in your washroom, you can go for the Side-Mount Handle. These toilet handles add a pure aesthetical element to the bathroom ambiance. If the handle comes out perpendicular to the wall behind the toilet, that’s such a decent indicator that you got a side-mount handle. The main characteristic of this type of handle is that it creates a 90-degree angle in the tank.
-
Universal Toilet Lever
This kind of toilet handle is compatible with any type of toilet. It is fit for the elongated and round toilets. Most of the universal toilet levers are not available in all hardware stores as it is a special type of handle. And another thing is that it is more costly than most toilet handles.
Related Parts of a Toilet Flush Lever
Thousands of toilet parts must not be known to the mass of people, but the professionals need to carry the information about each part of the toilet. In this section, we will discuss the most significant parts that are related to the toilet lever.
- The trip lever
- The chain lever
- The plastic flapper valve
- The valve seat
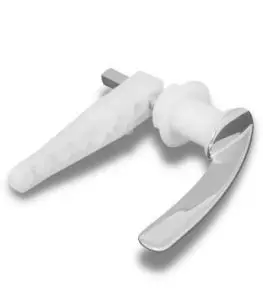
Trip lever
When you press the toilet lever, the part that feels the very first effect is the trip lever. It is made of stainless steel or iron aluminum. No matter the compounding material, its main duty is to initiate and open the flapper valve to permit water to infiltrate into the toilet bowl. A chain is attached on one side of this trip that helps the flapper valve open. Combinedly, all these parts work as a unit to initiate a flushing mechanism.
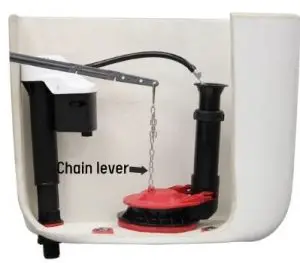 Chain lever
The chain lever is the main supporting part of the trip lever. The chain is often made of stainless steel. A small metal clip at the end of the chain lever is connected with a small metal ring. Finally, use needle-nose pliers to strengthen the link located in the ring. The chain lever mainly works as the crane to pull out the flapper valve.
Flapper valve
It is practically the most important part of the toilet tank. This is mainly the round rubber element that is situated at the bottom of the tank. When you push the toilet handle, then the trip lever is initiated, and the chain related to the flapper makes the flapper open up and allows the water to reenter the toilet bowl; thus, a full flushing system is initiated. If the flapper is being damaged or worn out, then the toilet starts to run out without any reason. A damaged flapper can not hold the water and cannot control the water flow that is unnecessarily entering the toilet bowl.
Valve seat
The valve seat is the element connected with the flapper. It is the particular place where the flapper is being attached. Water flows through this part, and thus a flush is done.
The estimated cost of changing the flush lever
The flush lever is a budget-friendly product. You don’t have to spend that many dollars on repairing or replacing the flush lever. Most stainless steel flush levers cost 10 to 50 dollars. And if you go for the plastic flush lever, then the cost may reduce and go under 10$. And with the repairing wage, the cost will be no more than 70$ for any kind of standard flush lever.
Step-by-step guide for replacing a toilet flush lever
Replacing or changing the flush lever is quite an easy procedure, even if you can replace it without the help of professionals if you carefully follow this guide. Okay, let us see the complete procedure of replacing the flush lever,
Tools Required:
- Small screwdriver
- Toilet model compatible wrench
- Hand gloves
- Nuts and bolts
Step-1: Buy a new handle
The very first step is to purchase a new toilet handle from a renowned hardware shop. Here are some exclusive tips for you. Always try to purchase the stainless steel handle and avoid getting a plastic handle as they are less durable than the former one. The trick is to note down the model number of the toilet and purchase the same model toilet handle. That may eliminate the compatibility issue. You can find the toilet model number on the cover of the toilet. If you do not fund the toilet model information, then check the user’s manual for the complete specification of the bathroom. Always check the handle before buying. The package will contain the handle, the tilt lever or lift arm, the handle’s base, and a bolt with a nut that is attached to it. A sturdy handle can increase the workability of the entire toilet.
Step-2: Open the toilet tank
The next step is to remove the tank lid vigilantly. Most of the tank lid is made of ceramic or porcelain, so they are prone to scratching and chipping. You must have a closer look into the matter to restore the lid safely in a soft place. You may turn off the water supply line in this step though that is not mandatory. For extra care, you can turn off the water supply. 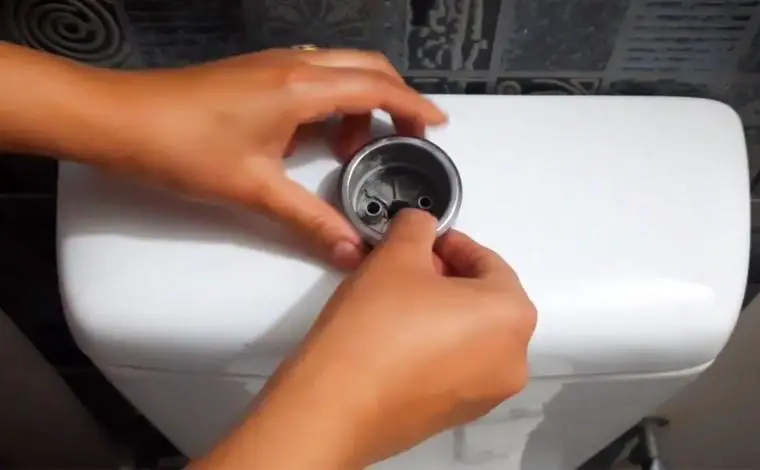
Step-3: Find the handle connecting the chain lever
The next step is very much crucial. In this step, you need to unhook the stainless steel chain from the trip lever in this step. There are so many holes in the trip lever, and the chain is attached to one of these holes. Find out the attaching hole and remember the spot, as after replacing the handle, you have to connect the chain to the same hole. The other side of the chain is attached to the flapper; keep in mind that you just need to unhook the side that is attached to the trip lever, not the side attached to the flapper.
Step-4: Remove the faulty handle
After unhooking the chain, it is now time to remove the old broken handle from its place. The handle is attached strongly with a nut and bolt system, so removing the handle with bare hands will be difficult. So in this step, allow a wrench to unscrew the nuts. Apply the wrench to the nuts and slowly rotate it right clockwise, and remove the nut bolts from their place. Do not put too much pressure on the wrench that may cause a scratch in the tank or even may break it. After you have unscrewed the nuts, slowly remove the handle and the trip lever.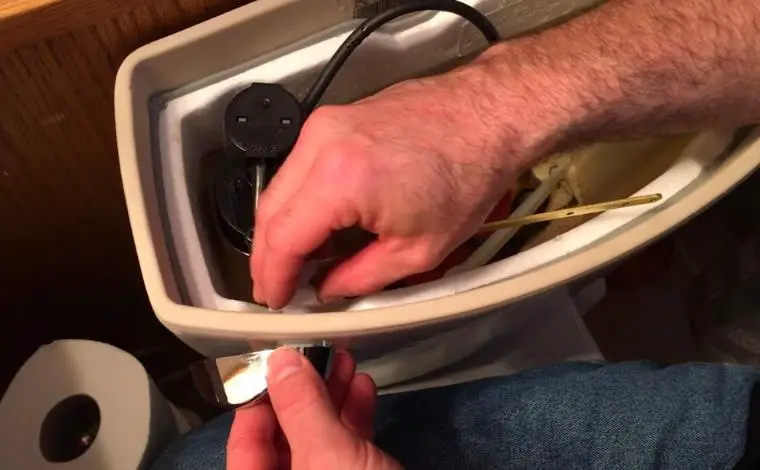
Step-5: Install the new handle
After removing the old handle, it is time to connect the brand new toilet handle. Before installing the new handle, clean the hole where the handle is attached. Clean it with a soapy bar and detergent and remove the rust and corrosive marks. After cleaning the hole now, install the new flush handle into the particular place again and apply the wrench to tighten the new handle. Rotate it anti-clockwise to tighten the handle. Do not tighten too much so that the screw cuts off. Ensure that the cistern has the water inlet and flush valve installed. Install the nylon sleeve into the cistern hole. Secure from the rear using a metal plate, washers, and back nut. Ensure the back nut is fastened tightly to avoid the handle becoming too loose, and the cistern hole may be in the frontier segment.
Step-6: You are done!
Finally, attach the stainless steel chain to the new trip lever. Remember the exact hole that the old trip lever held the chain; connect the flapper valve chain to one of the selected slots on the arm. Try to eliminate any slack in the chain. Hook the chain into exactly that hole and attach the other side with the flapper. Then turn on the water supply if you have stopped it earlier. That’s it, and you are done with replacing the flush lever.
Cleaning and maintenance of the toilet lever
Maintaining the toilet lever is like a piece of cake. Generally, the toilet lever section contains the trip lever, rubber flapper, and valve seat. All the parts are concealed in the Water tank except the handle itself. So all these parts do not need that much maintenance. It is enough only to clean the flush lever. You can use mild cleaners to eliminate the handle’s corrosion and rust. Then wipe it with a soft, damp cloth. That’s it for the maintenance of the handle of the toilet.
Final remarks
The flush lever is a crucial element for the toilet. How will you flush without the flush handle? As you have gone through the whole article, you must have realized that replacing the flushing handle is not that complex; you just need to follow the step-by-step procedure to change the old damaged flush handle successfully. I hope you follow this informative guide and do not have to worry about having a flush lever replaced.
We are really lucky to have a hard-working, multi-skilled plumber on our team. Collin D. Gallegos, a professional plumber who has worked with us since 2012, is an expert in vent, septic, and drainage systems. He is a Certified Master Plumber and has worked on various commercial plumbing projects. He usually helps our readers resolve plumbing and pipe-related issues with a proper DIY troubleshooting and repair guide.