Like any other home fixture, toilet parts also wear out. Regardless of how expensive your toilet is or how you maintain it, features like a fill valve will develop problems after many years of use. One of the common signs of a faulty or worn-out fill valve is a running toilet. Some faulty fill valve symptoms are:
-High or Low Float Problems
-Running Toilet
-Water Waste
-Clogging Issue
-Leaking issue
The good news is that replacing a fill valve is easy, and they are affordable. Therefore, you don’t need to seek professional plumber services to help you fix your running toilet. Nevertheless, you will require a few tools to replace your toilet’s fill valve. These include a new toilet fill valve, sponge, valve body, towel, scissors, bucket, and two channel-type pliers.
Note: The toilet fill valve is also known as a Ballcock, Balltap, or float valve.
How does a toilet fill valve work?
Before you replace a toilet fill valve, it’s crucial to understand how it works. A toilet fill valve controls the water that enters the toilet’s tank. It’s typically installed on the left-hand side of the toilet tank. It has a tailpiece that extends via the bottom of the tank, where it connects to a supply tube that connects to a fixture shutoff valve. The toilet fill valve opens and closes each time you flush the toilet.
Related article: How to change your toilet flange easily?
Toilet fill valve vs. flush valve: Are they the same?
No, they are not. The working mechanism and purpose are different. Here are the core differences between them:
| Fill Valve | Flush Valve |
| Controls the water level/float in the tank | Control water flow from tank to bowl |
| Connected to the main water supply line | Connected to the bowl with a flange and seal |
| Common Type | Different Types |
| Refills the tank after a flush | Flush water into the bowl |
| Less pricy | Slightly expensive |
10 Steps: How to Replace a Toilet Fill Valve?
After some time of use, the fill valve wears out or becomes faulty. If this happens, you should change it right away, or you will run into various troubles. Additionally, the fill valve should be changed together with the flush valve assembly as they work hand-in-hand. Below is a procedure for how to replace your toilet’s fill valve:
Step 1: Shut off the water supply
Before doing any repair or maintenance work in the toilet tank, you have to turn off the toilet water supply. You have to twist the water supply valve clockwise to shut off the water outside the toilet. Usually, the valve is located behind the toilet. Turning off the water simplifies things for you, as the tank won’t be refilled. Usually, you will have to turn the water valve clockwise to shut it off.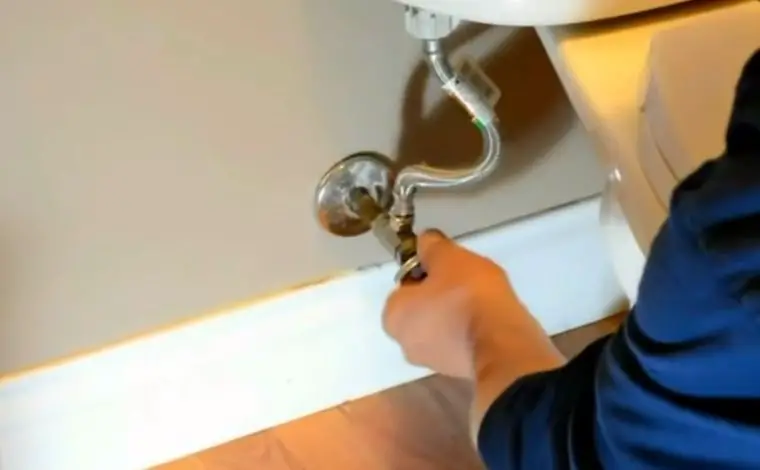
Step 2: Drain the tank and bowl
After switching off the water, the next step is to drain the water in the tank and bowl. Flush the water and hold the flush lever to get rid of as much water as possible. If a small amount of water remains on the tank floor, use a sponge or towel to soak the remaining water so that you have a dry surface to work with.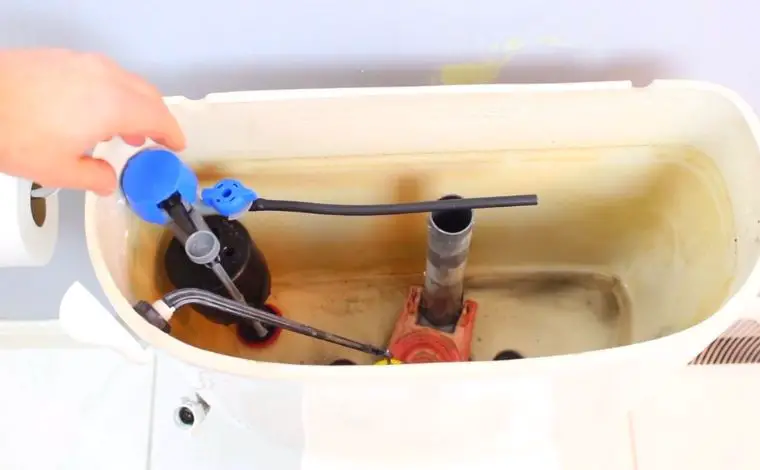
Step 3: Locate the fill valve
It would be better if you now located the toilet’s fill valve. Start by removing the tank lid and putting it on a safe surface, such as on a clothing piece. You will see the toilet fill valve on one side of the toilet. In older toilets, the float is separate but connected to the fill valve. While in newer toilets, it’s usually an entire plastic column that features a float and the on/off lever for filling the tank. Additionally, the fill valve also comes with a tube that links it to the overflow pipe. All you have to do is remove the refill tube from the overflow pipe holder. After that, you need to unhook the flapper chain from the flush lever. It will give you more space and provides ease for the installation.
Step 4: Disconnect the fill valve
A faulty fill valve may cause water leakage from the toilet tank. After identifying the fill valve, detach it from its base by unscrewing the nut that holds it in place. Use pliers or wrenches to turn it counterclockwise. Afterward, pull the supply line out of the valve below the tank. Note that some water may flow from the supply line as you detach it from the fill valve. Have a bucket below to gather this water.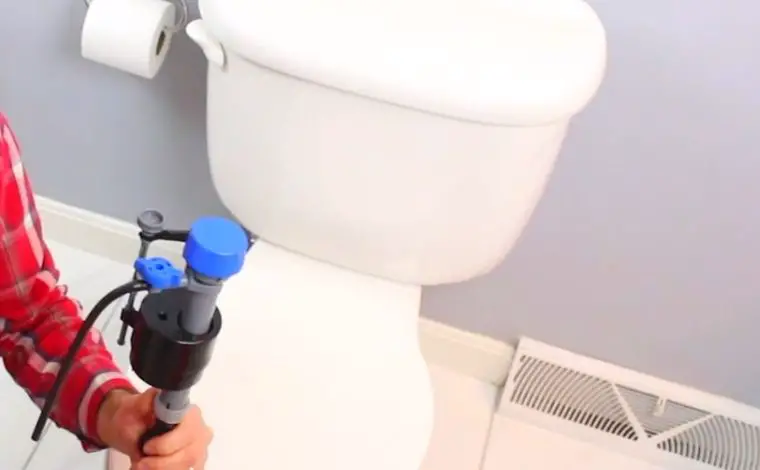
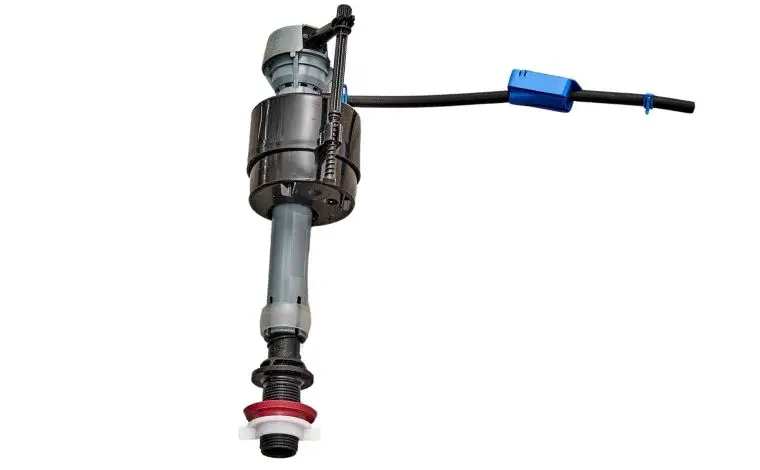
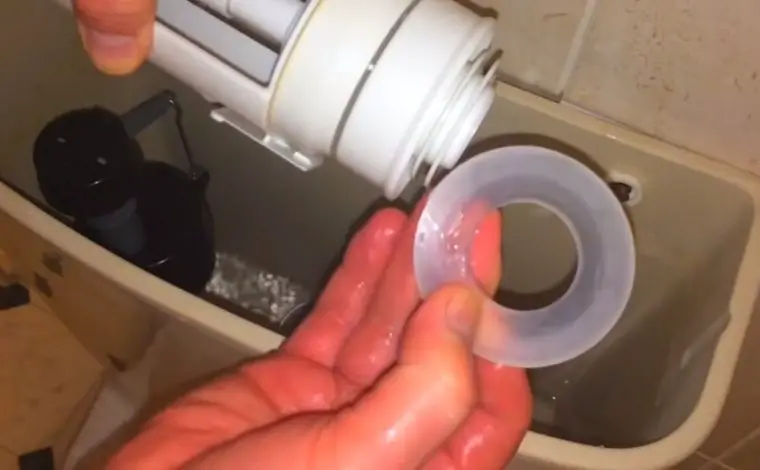
Step 5: Prepare installation of the new fill valve
Prepare the new fill valve for installation by sliding the rubber washed included with the kit to the bottom flange on the fill valve tailpiece. The washer is vital as it delivers an inner seal that prevents water from leaking around the toilet base. If needed, adjust the height of the new fill valve. Ensure the top of the fill valve should be slightly taller than the top of the overflow tube. But it shouldn’t be too tall that it prevents the toilet tank’s lid from closing properly.
Step 6: Install a new fill valve.
Place the fill valve into the toilet tank and insert the tailpiece via the opening at the bottom of the toilet tank. Place the fill valve so that the water outlet nipple faces the overflow tube inside the tank. Next, use one hand to hold the fill valve as you use the second hand to turn the mounting nut onto the tailpiece from underneath the toilet. You can now tighten the nut using pliers or wrenches so that it can hold the valve securely. That’s how you can replace your old fill valve by following some simple steps.
Related article: Best ways to keep your toilet clean and hygienic properly
Step 7: Ensure the washers are in place
When installing the fill valve, you should ensure that all parts are reconnected as they were before. Aside from screwing the nuts in their place, you should also make sure the washers are properly fixed in place. Washers should be inside and outside of the tank where the fill valve goes through. These make sure your toilet has a tight seal. After ensuring that the washers are intact, tighten the nuts and add support to the seal.
Step 9: Re-attach the water supply.
You can now re-attach the water supply line to the bottom of the new fill valve. You can as well as allow water to flow into the tank and turn on the water shutoff valve clockwise. Water will fill the tank. You can test if the fill valve is working fine. If you notice any leak, turn off the water and check whether you installed every thin as needed.
Step 10: Adjust the fill valve.
Finally, if the new fill valve is fine, you should see whether the water level is okay in the tank. Then, adjust the float to get the right water level. This is easy as you only have to adjust the screw at the top of the float shaft or by adjusting the screw at the top of the valve where the float connects. The toilet float cup should be at least 1 inch below the top of the overflow tube when the toilet tank is filled. Your work is complete, and you can use your toilet harmoniously.
Conclusion
A faulty fill valve is a common toilet issue most owners face. With this guide, changing your worn-out fill valve shouldn’t be a problem anymore. But as you change the fill valve, make sure to change the flush valve assembly as well. Fill valves are cheap and easy to fix. Ensure you follow the manufacturer’s instructions to install the new fill valve and flush assembly properly.
Hi, this is Robert Crossan, the owner of this website, has 17 years of experience in the installation, maintenance, and repair of toilets and plumbing systems. After completing the Level 2 Basic Plumbing course in 2005, I started working in both domestic and commercial buildings as a professional plumber. So I can figure out the core difference between different toilet models and brands. It also helped me monitor their work performance and setbacks.