Before learning the steps of how to drain a toilet, it’s important to understand why this task matters in the first place. Many homeowners only think about draining a toilet when it overflows or when a plumber asks them to do so. However, there are several common situations where draining the water is necessary, and knowing how to do it yourself can save time, money, and frustration.
Cleaning Purposes
Over time, toilets accumulate stains, mineral deposits, and even mold inside the tank and bowl. If you want to deep clean your toilet thoroughly, simply scrubbing the surface isn’t enough—you need to remove the water first. This gives you access to every corner of the tank and bowl, making cleaning much more effective.
Toilet Repairs
A large number of toilet repairs require you to work on components inside the tank, such as the flapper, fill valve, or flush valve. These parts cannot be fixed or replaced while submerged in water. Similarly, if you’re dealing with leaks around the base of the toilet or need to replace the wax ring, both the tank and bowl must be drained to prevent messy spills during the repair.
Replacing the Toilet
When upgrading or installing a new toilet, it’s essential to fully drain the old one. Lifting and moving a toilet that still has water in it can lead to spills all over your bathroom floor. Draining first ensures a smoother, cleaner, and safer installation process.
Preventing Water Damage
In colder climates or when leaving home for extended periods, some homeowners drain their toilets to prevent damage. Water left sitting in the bowl or tank can freeze and cause cracks, or it can become stagnant, leading to unpleasant odors.
Saving Time and Money
Perhaps the biggest reason to learn how to drain a toilet is independence. Instead of paying a plumber for a simple task, you’ll know how to do it yourself in under 15 minutes. This small skill often makes larger repairs and cleaning jobs much easier.
Tools and Preparation
Draining a toilet may sound like a messy chore, but with the right tools and a little preparation, the job becomes straightforward. Before you begin learning how to drain a toilet, it’s important to set up your workspace, gather supplies, and take safety measures. Good preparation not only saves time but also prevents unnecessary messes and damage.
Essential Tools You’ll Need
Having the right tools on hand ensures you won’t have to stop midway to look for something. Here are the most useful items for the process:
- Rubber gloves: Toilets contain germs, bacteria, and cleaning chemicals, so gloves protect your hands.
- Bucket and cup/small bowl: These are handy for scooping water and transferring it safely.
- Sponge or absorbent towel: Perfect for soaking up the last bits of water in the tank or bowl.
- Rags or old towels: Place them on the floor around the toilet to catch drips and protect tiles or wood flooring.
- Plunger: Useful not just for unclogging but also for pushing water out of the bowl.
- Wet/dry vacuum (optional): If you own a shop vac, this is the fastest way to remove water from both tank and bowl.
- Flexible hose: Needed for siphoning water into a bucket if you prefer the gravity method.
- Pliers or adjustable wrench: Sometimes needed if you have to work on the water supply valve or fittings.
Preparing the Workspace
Before starting the actual process of how to drain a toilet, spend a few minutes preparing the area:
- Clear the surroundings. Remove bath mats, rugs, or anything else that may get wet.
- Protect the floor. Place towels or newspapers around the base of the toilet to absorb any drips.
- Plan where to set the tank lid. Since it’s made of fragile porcelain, put a soft rag or folded towel on the floor or counter so you don’t risk cracks.
- Keep your bucket nearby. You’ll need it frequently while draining, so place it within easy reach.
Safety First
It’s easy to overlook safety when doing a task as simple as draining a toilet, but a few precautions go a long way:
- Wear gloves at all times. Even if the water looks clean, bacteria may still be present.
- Work slowly and carefully. Porcelain parts such as the tank lid are fragile and expensive to replace.
- Check your shutoff valve first. Ensure it’s working properly before you start—otherwise, water may keep flowing into the tank.
Related Article: 10 Easy Steps to Replace a Toilet Seat
How to Drain Water from the Toilet Tank
The toilet tank is the first place you should focus when learning how to drain a toilet. Most of the flushing mechanism is located inside the tank, so if you’re repairing or replacing a part like the fill valve, flush valve, or flapper, the water inside must be removed completely. Luckily, draining the tank is one of the easiest steps in the process.
Step 1: Shut Off the Water Supply
Locate the shutoff valve on the wall or floor behind your toilet. Turn the handle clockwise until it stops. This prevents new water from entering the tank. After closing it, test by flushing the toilet once—if no water flows back into the tank, the valve is properly sealed.
👉 Pro Tip: If water keeps trickling in even after turning the valve, it may be faulty. In that case, shut off the main water supply for your home and consider replacing the valve later.
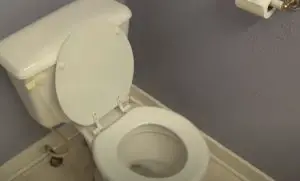
Step 2: Remove the Tank Lid Carefully
To access the water, lift the porcelain tank lid straight up. Place it gently on a soft towel or rag. Porcelain can chip or crack easily if placed directly on a hard surface like tile or stone.
Step 3: Flush the Toilet
Press the flush handle and hold it down. This allows most of the water in the tank to drain into the bowl. Sometimes one flush isn’t enough—repeat the process until the tank looks nearly empty.
👉 Note: If the tank continues to refill, double-check the shutoff valve to ensure it’s completely closed.
Step 4: Drain Remaining Water
Even after flushing, a small amount of water will remain at the bottom of the tank. There are two main ways to remove it:
- Sponge Method: Place a sponge inside the tank, soak up the leftover water, and wring it into a bucket. Repeat until the tank is dry.
- Wet/Dry Vacuum Method: If you own a shop vac, you can remove the remaining water in seconds. Just remember to sanitize the vacuum afterward.
Step 5: Inspect for Repairs
With the tank empty, you can now safely clean or repair its components. Whether you’re replacing the flapper, adjusting the float, or cleaning hard-water deposits, the workspace is much easier to handle when dry.
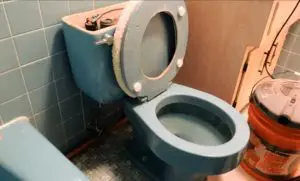
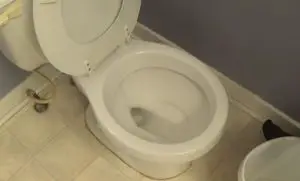
How to Drain Water from the Toilet Bowl
Once the tank is empty, the next step in how to drain a toilet is clearing the water from the bowl. Unlike the tank, which empties with a simple flush, the bowl is designed to hold water at all times to create a seal that blocks sewer gases. That’s why draining the toilet bowl requires extra effort. Depending on your tools and comfort level, you can choose from several effective methods.
Method 1: Use a Plunger
A plunger isn’t just for unclogging—it can also help push water out of the bowl. Place the plunger firmly over the drain hole and pump up and down several times. The pressure forces water through the trapway and down the drain. Repeat until the water level drops significantly. For the small amount that remains, absorb it with a sponge.
👉 Why this works: The plunger creates suction and pressure, mimicking a flush without adding extra water.
Method 2: Pour a Bucket of Water
Fill a bucket with water and quickly pour it into the bowl. The sudden force pushes existing water through the trap. Repeat two or three times until the bowl is nearly empty. Wipe up the leftover water with a sponge or towel.
👉 Tip: Pour the bucket quickly rather than slowly—the speed is what forces the water down.
Method 3: Siphon with a Hose
If you want a hands-free approach, siphoning is an old but reliable method:
- Take a flexible hose and fill it with water.
- Seal both ends with your thumbs.
- Place one end in the toilet bowl and the other in a bucket positioned lower than the toilet.
- Release your thumbs. Gravity will pull water from the bowl into the bucket until only a small amount is left.
👉 Safety tip: Always wear gloves during siphoning since your hands may touch toilet water.
Method 4: Scoop Water Out
Though not the most pleasant option, you can use a small cup or bowl to manually scoop water into a bucket. It takes more time, but it works in emergencies when you don’t have better tools. Finish by drying the last bit with a sponge.
Method 5: Wet/Dry Vacuum
For those who want the fastest method, a shop vac (wet/dry vacuum) is the ultimate solution. Insert the vacuum hose into the bowl, turn it on, and let it suck up all the water. This method is quick, clean, and requires minimal effort. Just be sure to disinfect the vacuum thoroughly afterward.
Which Method Should You Use?
- Quickest: Wet/dry vacuum
- Most traditional: Siphoning with a hose
- Most accessible: Plunger or bucket of water
- Last resort: Manual scooping
No matter which method you choose, always finish by sponging out the last few drops. A completely dry bowl ensures you can clean or repair it without mess.
Common Mistakes to Avoid When Draining a Toilet
Even though learning how to drain a toilet is relatively simple, many homeowners run into problems because they skip basic precautions or use the wrong tools. To save yourself from frustration—and prevent bathroom messes—here are the most common mistakes to watch out for.
Forgetting to Shut Off the Water Supply
One of the biggest mistakes is trying to drain the toilet without turning off the water supply. If you forget this step, the tank will keep refilling after every flush, making your effort pointless. Always turn the shutoff valve clockwise until it stops, and confirm by flushing once to ensure no water returns.
Dropping or Damaging the Tank Lid
The porcelain lid of a toilet tank is fragile and expensive to replace. Many people accidentally chip or crack it by placing it directly on tile or a hard floor. To avoid this, always place the lid on a towel, rag, or even a folded blanket.
Using the Wrong Vacuum
A regular household vacuum should never be used to suck up water from a toilet. It is not built for liquids and can break instantly—or worse, create an electrical hazard. Only use a wet/dry vacuum designed for liquid cleanup.
Not Protecting the Floor
Draining water often results in drips and small spills. If you don’t protect the floor, water can seep into grout lines or wood, causing stains, odors, or even long-term damage. Place old towels, rags, or a waterproof mat around the toilet before you begin.
Skipping Gloves and Safety Gear
Toilet water, even when it looks clean, contains bacteria. Handling it without gloves can expose you to germs. A simple pair of rubber gloves is enough to keep you safe and more comfortable while working.
Rushing the Process
Many people get impatient and try to rush through draining, especially when scooping or siphoning water. Going too fast can lead to spills or splashes. Take your time, and focus on keeping the process clean and controlled.
Ignoring Small Leaks or Valve Issues
Sometimes while draining, you may notice that the shutoff valve is leaking slightly or doesn’t close fully. Many homeowners ignore this, but it can lead to bigger plumbing issues later. If your valve isn’t working correctly, make a note to replace it soon.
Final Thoughts
By now, you’ve learned the complete process of how to drain a toilet, from emptying the tank to clearing out the bowl. What may have seemed like a messy or complicated job is actually straightforward once you know the right steps and have the proper tools prepared.
Key Takeaways
- Drain the tank first. Always shut off the water supply and flush until most of the water is gone. Use a sponge or wet/dry vacuum to remove what’s left.
- Then drain the bowl. Choose the method that works best for you—plunger, bucket, siphon, scooping, or wet/dry vacuum. Each option has its advantages, but the goal is the same: an empty, dry bowl.
- Protect yourself and your bathroom. Gloves, towels, and floor protection are small steps that make the job cleaner and safer.
- Take your time. Rushing increases the chance of spills, broken lids, or overlooked leaks.
Why This Matters
Knowing how to drain a toilet isn’t just about convenience—it’s about confidence. Instead of calling a plumber for something so simple, you can handle the job yourself. Whether you’re repairing a flapper, replacing a wax ring, or giving your toilet a deep clean, draining it properly is the first step toward success.
Final Advice
Always remember:
- If you’re only fixing or cleaning the tank, you only need to drain the tank.
- If you’re working on the bowl or replacing the toilet, you must drain both the tank and the bowl.
- After finishing, disinfect any tools you used (especially sponges, buckets, or vacuums) to maintain good hygiene.
Conclusion
Learning how to drain a toilet is one of the simplest but most useful DIY plumbing skills a homeowner can have. It saves you money on service calls, prevents unnecessary mess, and makes every repair or cleaning job easier. With a little preparation and patience, you can drain your toilet quickly, safely, and confidently—setting the stage for whatever task comes next.
We are really lucky to have a hard-working, multi-skilled plumber on our team. Collin D. Gallegos, a professional plumber who has worked with us since 2012, is an expert in vent, septic, and drainage systems. He is a Certified Master Plumber and has worked on various commercial plumbing projects. He usually helps our readers resolve plumbing and pipe-related issues with a proper DIY troubleshooting and repair guide.
If I am leaving my house in Florida for the summer and part of the winter, after draining the water from tank and bowl, should I put a cup of bleach in the bowl. Also should I cover the bowl with saran wrap. Please respond by email . Thank you , Tony
same as previous comment by Anthony