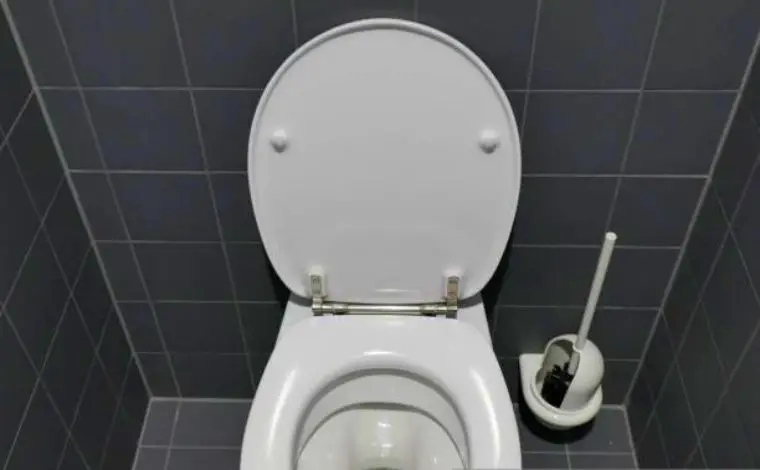
Dirty toilets are unpleasant to use. They not only create discomfort but also ruin the overall look and hygiene of your bathroom. While most people focus on cleaning the toilet bowl, seat, and floor, one spot often gets ignored — the toilet seat hinges. These small parts can harbor bacteria, rust, and grime if left uncleaned for too long.
Keeping your toilet seat hinges clean is essential for maintaining both hygiene and the lifespan of your toilet. The good news is that you can easily clean them with common household items like vinegar, baking soda, and an old toothbrush.
In this detailed guide, you’ll learn step-by-step how to clean toilet seat hinges by yourself safely and effectively — without using harsh chemicals or expensive tools.
Why It’s Important to Clean Toilet Seat Hinges
When most people clean their toilets, they focus on visible areas. However, the hinges behind the seat are hidden and can collect soap scum, urine residue, mildew, and bacteria over time.
If ignored, dirty hinges can cause:
-
Bad odors coming from the back of the toilet.
-
Corrosion and rust, especially on metal hinges.
-
Loose toilet seats, as dirt buildup affects screw tightness.
-
Unhygienic conditions, increasing the risk of bacterial infection.
A sparkling clean toilet reflects your personality and attention to detail. A tidy, odor-free bathroom leaves a lasting impression on guests and makes your home more comfortable to live in.
Tools and Items You’ll Need
You don’t need to buy expensive cleaners. Most of the ingredients required are already available in your home.
Here’s what you’ll need:
-
A pair of rubber gloves (for protection)
-
White vinegar (for disinfecting and removing stains)
-
Baking soda (for deodorizing and scrubbing)
-
A screwdriver (to remove the toilet seat)
-
A soft old toothbrush (for scrubbing)
-
A clean cloth or towel
-
Mild disinfectant spray or soap solution
-
Lubricant or mineral oil (for metal hinges, optional)
Tip: Avoid strong bleach or abrasive pads, as they can damage plastic seats or the ceramic surface.
Step-by-Step: How to Clean Toilet Seat Hinges
Let’s go through the complete cleaning process from start to finish.
Step 1: Close the Toilet Lid and Prepare
Before you start, put on your rubber gloves to protect your hands from germs and cleaning agents.
Close the toilet lid so you can work comfortably and prevent water splashes inside the bowl.
Make sure your cleaning tools are nearby. It’s best to keep a small bucket or bowl for mixing vinegar and baking soda paste.
Step 2: Remove the Toilet Seat
To access the hinges properly, you’ll need to remove the toilet seat.
-
Locate the screws or bolts at the back of the seat.
-
Use a screwdriver to loosen and remove them.
-
Lift off the seat carefully and set it aside.
If your toilet seat has plastic hinge covers, gently pop them open to expose the screws. Avoid using too much force to prevent cracking.
Removing the seat helps you clean hidden spots that are usually unreachable with the seat attached.
Step 3: Uncover the Hinges
Some toilet seats have a protective plastic cap over the hinge area. Open or remove these caps to expose the hinges completely.
You’ll likely notice discoloration, grime, or even rust if it hasn’t been cleaned in a while. Don’t worry — the next steps will restore their shine.
Step 4: Make a Natural Cleaning Paste
The combination of baking soda and vinegar is one of the most effective natural cleaning solutions. It disinfects, removes odor, and breaks down mineral buildup.
Here’s how to make it:
-
Mix 1 part vinegar with 2 parts baking soda.
-
Add a small amount of water to form a thick paste.
-
Stir the mixture until smooth using a spoon or toothbrush.
This paste is powerful enough to remove stains and kill bacteria without damaging surfaces.
Step 5: Apply the Paste on Hinges
Now, apply the vinegar-baking soda paste generously on the hinges and surrounding areas. Make sure it covers all visible dirt, rust, or mold spots.
Let it sit for 10–15 minutes. The fizzing reaction means it’s working — breaking down grime and dissolving stains.
Step 6: Scrub the Hinges Thoroughly
After 15 minutes, take your old toothbrush and start scrubbing. Focus on every corner and the inner side of the hinge where buildup is common.
-
Use circular motions to loosen dirt.
-
Apply more paste if necessary.
-
Don’t use a hard brush — it might scratch the ceramic surface.
This step is crucial. Take your time until every hinge looks visibly cleaner.
Step 7: Rinse and Wash the Hinges
Once you’ve finished scrubbing:
-
Use warm water to rinse the hinges thoroughly.
-
Wipe away any leftover residue with a clean cloth.
-
Make sure there’s no baking soda or vinegar left on the surface.
If the hinges are removable, you can even dip them in a small bowl of warm water mixed with a few drops of liquid soap for a deeper clean.
Step 8: Dry Completely
After washing, it’s important to dry the hinges completely. Leaving moisture on metal hinges can cause rust over time.
Use a dry towel or tissue to remove all water. You can also let them air-dry for a few minutes before reattaching.
Tip: Always keep your toilet area dry after every cleaning session. Moisture is the main reason behind rust and odor.
Step 9: Apply Lubricant or Oil (Optional)
If your toilet has metal hinges, apply a few drops of lubricating oil or WD-40 to prevent rust and improve movement.
Use a dropper or cotton swab to apply the oil directly to the hinge joints.
Wipe off any excess oil to avoid slippery surfaces.
For plastic hinges, skip this step — oil isn’t necessary.
Step 10: Reattach the Toilet Seat
Now that the hinges are shiny and clean:
-
Refit the seat and align it properly.
-
Tighten the screws using your screwdriver.
-
Check that the seat opens and closes smoothly.
If you notice any looseness, adjust the screws again until it’s firm.
Additional Tips for Keeping Toilet Seat Hinges Clean
-
Regular maintenance: Clean the hinges at least once every three months to prevent buildup.
-
Use mild cleaners: Strong bleach can weaken plastic hinges or fade color.
-
Keep dry: Always wipe the hinge area after cleaning or mopping the floor.
-
Use toilet seat covers: They reduce direct contact and protect the hinges from splashes.
-
Inspect regularly: Check for rust or cracks — replacing damaged hinges early will save you trouble later.
Common Mistakes to Avoid
Even simple cleaning tasks can go wrong if done carelessly. Avoid these mistakes when cleaning toilet seat hinges:
-
Skipping protective gloves: You’re dealing with bacteria and germs — gloves are essential.
-
Using steel wool or rough pads: They can scratch the surface.
-
Leaving moisture behind: Causes corrosion and foul odor.
-
Over-tightening screws: May crack the plastic seat or strip the threads.
-
Ignoring the hinge covers: Always clean under and around them too.
Why Vinegar and Baking Soda Work Best
These two kitchen staples are nature’s cleaning power duo.
-
Vinegar (acetic acid) dissolves mineral deposits, soap scum, and bacteria.
-
Baking soda (sodium bicarbonate) acts as a mild abrasive that lifts stains and neutralizes odors.
-
When combined, they create a chemical reaction that foams up and breaks down dirt effortlessly.
This method is safe for both plastic and stainless-steel hinges, making it ideal for regular cleaning.
Alternative Cleaning Methods
If you want to try something different, here are a few alternatives:
1. Using Lemon Juice and Salt
Lemon’s citric acid cuts through grime and disinfects naturally. Mix lemon juice with a spoon of salt, apply it to the hinges, leave for 10 minutes, then scrub.
2. Using Hydrogen Peroxide
Hydrogen peroxide is a great disinfectant. Pour some on a cloth and wipe the hinge area. It removes bacteria and brightens dull spots.
3. Using Dish Soap Solution
If your hinges are not very dirty, a mixture of warm water and mild dish soap can do the job. Use a sponge or soft cloth to clean the area.
Preventing Rust and Odor in Toilet Hinges
Once your hinges are clean, prevention is key to keeping them that way.
-
Always wipe after every wash or splash.
-
Apply a light coat of petroleum jelly to metal hinges to prevent rust.
-
Keep your bathroom ventilated to reduce moisture buildup.
-
Occasionally spray disinfectant around the hinges to kill bacteria.
-
Inspect and tighten the screws monthly.
Troubleshooting: When Hinges Are Too Dirty or Rusty
If you’ve neglected your toilet seat hinges for a long time, regular cleaning might not be enough.
-
For severe rust: Use a rust remover specifically designed for bathroom hardware.
-
For broken or stuck screws: Apply WD-40 and wait 10 minutes before attempting to unscrew.
-
For cracked plastic hinges: Replacement is better than cleaning — they’re inexpensive and easy to install.
Final Thoughts
Every small component in your bathroom contributes to its overall hygiene and appearance — and toilet seat hinges are no exception.
Ignoring them can lead to rust, bad smells, and even loose seats. Luckily, with a few household ingredients like vinegar, baking soda, and a toothbrush, you can make your toilet shine again within minutes.
A clean hinge means a clean seat — and a clean seat means a truly clean toilet. So don’t wait until they look dirty; make it a part of your regular cleaning routine.
FAQ
How can I stop my toilet seat hinges from rusting?
Dry them after every cleaning and apply a few drops of mineral oil or WD-40 monthly. Keeping moisture away is the best rust prevention.
How often should I clean my toilet seat hinges?
Ideally, every two to three months. However, if your bathroom stays humid or the toilet is used frequently, clean them once a month.
Can I use bleach to clean toilet hinges?
You can, but use it cautiously. Always dilute bleach with water (1:10 ratio) and rinse thoroughly to avoid corrosion or discoloration.
Why do my toilet seat hinges smell?
Odor usually comes from trapped urine or moisture under the hinges. Regular cleaning with vinegar or disinfectant will eliminate the smell.
Hi, this is Robert Crossan, the owner of this website, has 17 years of experience in the installation, maintenance, and repair of toilets and plumbing systems. After completing the Level 2 Basic Plumbing course in 2005, I started working in both domestic and commercial buildings as a professional plumber. So I can figure out the core difference between different toilet models and brands. It also helped me monitor their work performance and setbacks.